Hochwertige Alternativen zu VELUX Dachfenster
Warum Sie auch OptiLight, RoofLITE+ und SkyLight Dachfenster in Betracht ziehen sollten
Obwohl VELUX eine der bekanntesten Marken für Dachfenster ist, gibt es mehrere überzeugende Gründe, sich für andere Marken wie OptiLight, RoofLITE+ und SkyLight zu entscheiden. Diese Marken bieten nicht nur vergleichbare Qualität, sondern auch attraktive Preise und geprüfte Technologien, die Hausbesitzer begeistern werden. Hier sind einige Gründe, warum diese Alternativen in Betracht gezogen werden sollten:
Preis-Leistungs-Verhältnis
Einer der Hauptgründe, sich für eine Alternative zu VELUX zu entscheiden, ist das verbesserte Preis-Leistungs-Verhältnis. Marken wie OptiLight, RoofLITE+ und SkyLight bieten ähnliche Eigenschaften zu einem niedrigeren Preis.
- OptiLight Dachfenster sind im Grunde die Reaktion der Firma KRONmat auf die steigende Nachfrage nach preiswerten Dachfenstern. Die 2008 gegründete Kronmat GmbH mit Sitz in Mannheim ist Mitglied der FAKRO Gruppe, des zweit-größten Herstellers von Dachfenstern in der Welt. Als hundertprozentige FAKRO Tochter beliefert sie als Vertriebsgesellschaft den Fachhandel in Deutschland, Österreich, Schweiz und Luxemburg. OptiLight Pro-dukte bieten hohe Qualität zum günstigen Preis. Moderne Technologie der Materialvorbereitung und -verarbeitung, Qualitäts-kontrolle in jeder Produk-tionsphase sowie in unabhängigen Laboratorien durchgeführte Tests garantieren hohe Qualität der OptiLight Fenster. Diese Dachfenster kombinieren Funktionalität und Ästhetik zu einem erschwinglichen Preis. Mehr über OptiLight finden Sie hier.
- RoofLITE+ ist eine Marke für ein Dachfenster inkl. Zubehör eines großen skandinavischen Herstellers. Der Eigentümer der Marke RoofLITE+, Altaterra Kft., ist ein dynamisches, internationales Unternehmen, das auf vielen europäischen Märkten tätig ist. Altaterra ist Teil der VELUX Holding, die über mehr als 80 Jahre Erfahrung in der Herstellung von Dachfenstern verfügt und Eigentümerin der Marke VELUX ist. Das Unternehmen bietet Fenster für das wirtschaftliche Segment an. Qualitativ hochwertige Produkte zu niedrigsten Preisen ergeben sich aus dem Wegfall unnötiger Ausgaben in Bezug auf die Lieferkette, die Vermarktung sowie die Vereinfachung der angebotenen Produktpalette. Durch die Optimierung der Lieferkette und das Weglassen unnötiger Ausgaben ist RoofLITE+ in der Lage, qualitativ hochwertige Dachfenster zu deutlich niedrigeren Preisen als VELUX anzubieten. Dies macht sie zu einer idealen Wahl für preisbewusste Bauherren. Erfahren Sie mehr über RoofLITE+ hier.
- SkyLight überzeugt durch pflegeleichte Kunststoff-Dachfenster, die speziell für Feuchträume entwickelt wurden, aber auch in anderen Bereichen des Hauses ideal sind. Dank der weit optimierten Produktionsprozesse bietet SkyLight Dachfenster in hoher Qualität zu niedrigen Preisen. Die Schweizer AFG Gruppe (Arbonia-Forster-Holding AG) ist Spezialist für die Produktion hochwertiger Kunststoff Dachfenster. Seit 2008 produziert Skyfens (AFG Gruppe) die beliebten SkyLight Dachfenster. Mit der Robustheit, dem einfachen Einbau, der Langlebigkeit und nicht zuletzt aufgrund des günstigen Preises, haben sich die SkyLight Dachfenster schnell einen Namen in der Baubranche gemacht. Weitere Informationen zu SkyLight finden Sie hier.
Langlebigkeit und geringe Wartung
Im Gegensatz zu vielen Holzfenstern von VELUX, die regelmäßige Pflege erfordern, bieten SkyLight- und RoofLITE+-Fenster aus Kunststoff eine nahezu wartungsfreie Lösung. Kunststofffenster sind feuchtigkeitsresistent und rostfrei, was sie besonders langlebig und pflegeleicht macht. Diese Dachfenster sind ideal für Hausbesitzer, die nach einer praktischen, langlebigen Lösung suchen, ohne viel Zeit in die Wartung investieren zu müssen.
Energieeffizienz
Alle drei Marken, OptiLight, RoofLITE+ und SkyLight, bieten hochmoderne Wärmedämmtechnologien, die mit den VELUX Produkten vergleichbar sind. Diese Fenster tragen zur Reduzierung von Heizkosten bei, verbessern das Raumklima und helfen, die Energiekosten zu senken. Mehrfachverglasung und spezielle Beschichtungen sorgen für eine hervorragende Energieeffizienz.
Fazit: Warum alternative Dachfenster-Marken eine kluge Wahl sind
Wenn Sie eine erschwingliche Alternative zu VELUX suchen, sind OptiLight, RoofLITE+ und SkyLight hervorragende Optionen. Diese Marken bieten Qualität, geprüfte Technologie und Energieeffizienz zu einem günstigeren Preis und erfordern weniger Wartung.
Jetzt entdecken bei baubaY.de: OptiLight, RoofLITE+ und SkyLight – hochwertige Dachfenster zum besten Preis. Finden Sie die passende Lösung für Ihr Zuhause!
Heizkosten sparen und Minimieren von Energieverlusten - durch den Einbau neuer Dachfenster
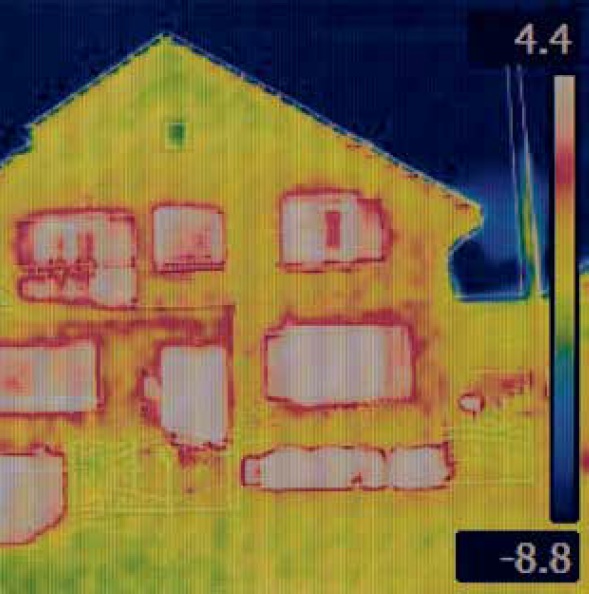
Die Heizkosten steigen und steigen. Fast zwei Drittel (63 %) der deutschen Hausbesitzenden sind sehr oder sogar extrem besorgt über die steigenden Energiekosten. Das ergab eine repräsentative Studie von OnePoll im Auftrag von Velux aus dem Oktober 2023. Erhöhte Energiekosten hängen häufig mit schlecht isolierten Dachfenstern zusammen. Über sie verliert das Haus rund ein Viertel seiner Raumwärme. Alte Dachfenster sind oft zugig, mit morschem Rahmen, dem man die vielen Sommer und Winter ansieht, und mit Glas, das weit hinter den heutigen Dämmwerten zurück liegt. Schimmel und Feuchtigkeit können die Folge sein. Daraus resultierend heizen die Bewohner stärker und die Energiekosten steigen. Bei den auf absehbare Zeit weiter steigenden Energiepreisen können, je nach ausgetauschter Fensterfläche, Einsparpotenziale von mehrere hundert Euro im Jahr zusammenkommen.
Eine einfache Möglichkeit, Heizenergie zu sparen, ist der Austausch alter Fenster, die nicht mehr den heutigen Anforderungen an eine effektive Wärmedämmung entsprechen. Jetzt wäre sicherlich ein guter Zeitpunkt, diese Investition in Angriff zu nehmen. Lohnend ist es allemal, denn für energetische Maßnahmen können Sie staatliche Zuschüsse nutzen. Dabei steht die 3-fach Verglasung im Fokus, die dank ihrer hervorragenden Eigenschaften im Falle eines Austausches sogar mit 15% staatlich gefördert wird. Oft sind die alten Dachfenster auch zu klein dimensioniert und lassen nicht genug Tageslicht in die Wohnräume unterm Dach. Oder die Anordnung ist zu hoch oder zu tief, so dass ein freier Blick nach draußen schwierig ist. Mit neuen Dachfenstern lassen sich all diese Themen auf einmal lösen. Sie schaffen mehr Wohnkomfort und dämmen bestens dank ihrer modernen Dachfenster-Verglasung.
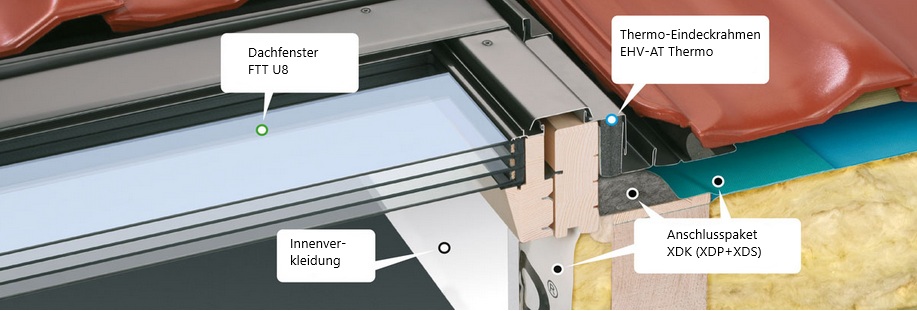
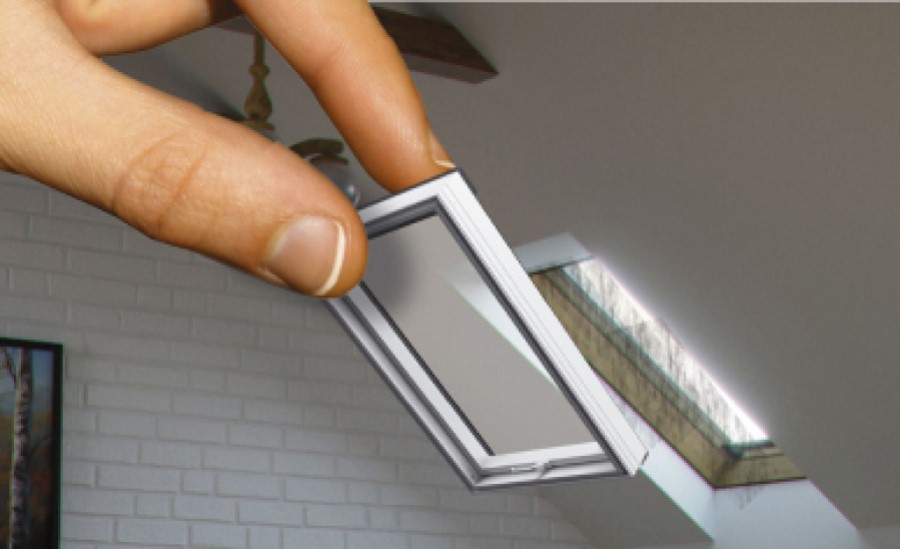
Beim Austausch von Dachfenstern kann man zwischen mehreren Varianten wählen. Beim Austausch empfehlen Fensterexperten, am besten auch gleich die Innenverkleidung zu erneuern: So kann der Dachhandwerksbetrieb auch die Anschlüsse entsprechend den Anforderungen des Zentralverbands des Deutschen Dachdeckerhandwerks (ZVDH) sicherstellen. Dies minimiert Wärmebrücken, verbessert die Dichtigkeit und sorgt so für niedrigere Heizkosten.
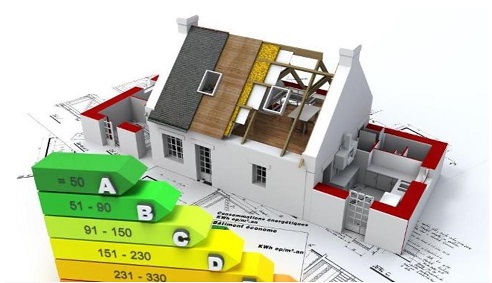
Planen Sie den Einbau neuer Dachfenster, ist es wichtig, dass auch die Wärmedämmung des Dachs den modernen Vorgaben der Energieeffizienz entspricht. Denn der Energieverlust durch Dachfenster ist nicht der einzige Faktor, der die Heizkosten belastet. Nicht oder nur schlecht gedämmte Dächer tragen in hohem Maße dazu bei. Daher ist es sinnvoll, auch hier entsprechende Maßnahmen zu treffen. Die finanzielle Belastung einer umfangreichen energetischen Sanierung des Daches wird durch die Förderprogramme der KfW minimiert. Denn das Förderprogramm „151 Energieeffizient Sanieren“ der KfW Förderbank unterstützt nicht nur komplette Gebäudesanierungen, sondern auch energetische Einzelmaßnahmen. Dazu zählt die Wärmedämmung des Dachs entsprechend modernster Standards genauso wie der Einbau energieeffizienter Dachfenster.
Bleibt die Innenverkleidung erhalten, dann wird die umliegende Tapete oder Fliese nicht beschädigt, allerdings bleibt damit auch die alte Dämmung rund ums Fenster erhalten. Die Größe des Fensters bleibt dabei unverändert und das vorhandene Innenfutter erhalten, sodass meistens auch keine Fliesen oder Holzvertäfelungen im Zimmer erneuert werden müssen. Wichtig zu wissen: Die Wärmedämmung verbessert sich dabei nicht im selben Maße wie bei einem Komplett-Austausch.
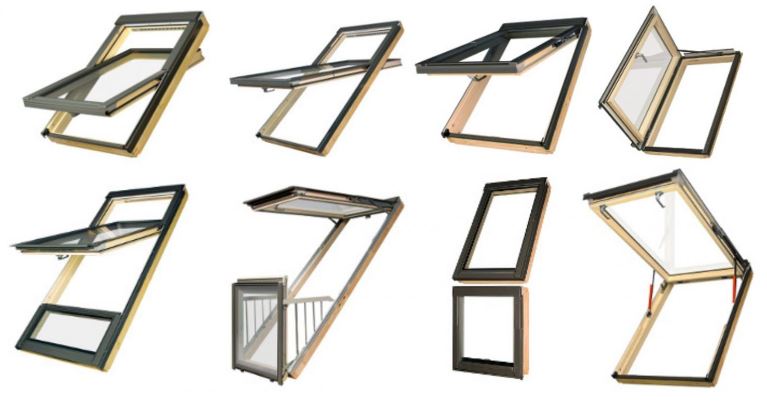
Im Rahmen eines Komplett-Austauschs ist auch eine Erweiterung der Fensterlösung denkbar. Ein Austausch ist auch der perfekte Zeitpunkt, um ein größeres Modell zu wählen oder sogar den Einbau mehrerer Dachfenster in Erwägung zu ziehen. Im Laufe der Jahrzehnte hat sich hinsichtlich technischer Ausstattung, Material und Design extrem viel getan, sodass die vorhandene Fenstergröße modernen Wohnansprüchen nicht mehr genügt. So haben wir heute eine europaweit geltende Tageslichtnorm (DIN EN 17037). Danach sollten 20 - 25 % der Raumgrundfläche als Fensterfläche geplant werden, damit für ausreichend Tageslicht und Frischluft gesorgt ist. Zusatzplus in Sachen Stromsparen: Sie nutzen viel länger am Tag das natürliche Licht und müssen später das Licht anknipsen.
Moderne Dachfenster ermöglichen es durch ihre hohe Effizienz, größere Fensterflächen zu installieren. Denn kombiniert mit einer sehr guten Dachdämmung beeinflusst der höhere Glasanteil im Dach die Heiz- und Klimatisierungskosten nur unmerklich.
Vielmehr wirken sich die Vorteile der stark verbesserten Lichtverhältnisse im Dachgeschoss positiv auf die allgemeine Wohn- und Arbeitsatmosphäre aus. Denn ein lichtdurchfluteter Raum hebt die Stimmung, fördert die Konzentration und trägt allgemein zum Wohlgefühl bei. Da bei größeren Fensterflächen mehr Licht in den Raum gelangt, reduzieren sich die Zeiten künstlicher Beleuchtung, die abhängig vom vorhandenen Tageslicht eingeschaltet wird. Somit sparen Sie zusätzliche Energiekosten.
Ergänzend leisten Sie aktiv einen Beitrag zum Umweltschutz. Denn je energieeffizienter Dachfenster sind, umso geringer ist der Verbrauch an Heizmaterial und die Entstehung von Verbrennungsrückständen.
Welche Dachfenster einbauen?
Kunststofffenster sind in der Regel etwas günstiger, sodass sich Ihre Investition in neue Fenster am schnellsten amortisiert. Doch egal für welchen Rahmen Sie sich entscheiden – ein Austausch alter, einfachverglaster Fenster sorgt mit jedem Modell für geringere Energiekosten.
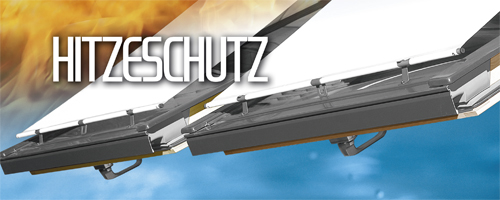
Aufgrund der dritten Scheibe bieten 3-fach Verglasungen weitaus besseren Schallschutz als die 2-fach verglasten Dachfenster. Insbesondere im Dachgeschoss ist das Aufheizen durch Sonneneinstrahlung in den Sommermonaten ein großes Problem, wodurch bereits beim Austausch der Dachfenster der Aspekt des Hitzeschutzes beachtet werden sollte. Die 3-fach Verglasung führt aufgrund unterschiedlicher Eigenschaften dazu, dass der Raum weniger auskühlt. Dank der guten Isolation zwischen den Scheiben kühlt die Scheibe im Innenraum nicht aus. Deswegen entsteht nicht das Gefühl von Zugluft in der Nähe der Scheibe, weil sich die Temperatur der Scheibe nicht von der Temperatur im Raum unterscheidet.
Warum sind Verdunkelungsrollos bei Dachfenstern so populär?
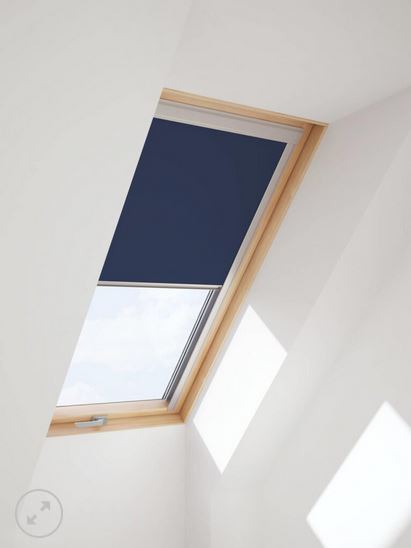
Eines der am häufigsten gekauften Zubehörprodukte bei Dachfenstern sind Verdunkelungsrollos. Warum ist das so? Wir möchten der Frage gern auf den Grund gehen und Ihnen hier die Vor- aber auch die Nachteile dieser Produktgruppe vorstellen und dabei auch zeigen, welche Möglichkeiten Sie mit diesem Produkt haben.
Dachfenster sind eine großartige Sache in einem ausgebauten Dachboden - sie lassen viel Licht herein und laden zum Träumen ein, wenn man die Wolken beobachtet. Viele Menschen mögen es, auf dem Sofa zu liegen, und dem Regentrommeln auf der Fensterscheibe zu lauschen. Oder im Bett den Sternenhimmel zu betrachten.
Wie pflege ich mein Dachfenster richtig? Tips zu Pflege und Wartung
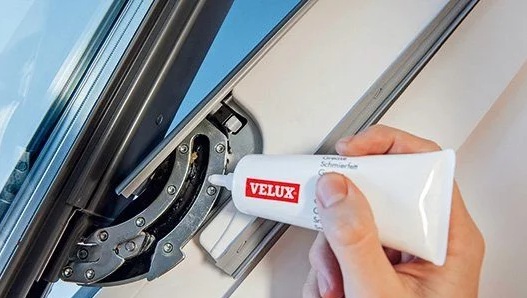
Bei Dachfenstern ist es so, wie bei jedem Gebrauchsgegenstand: gut gepflegt hält es einfach länger. Nur was bedeutet Pflege beim Dachfenster? Was genau soll ich tun, damit ich möglichst lange daran Freude habe? Wir geben Ihnen gerne ein paar Antworten und Tips.
Mit welcher Lebensdauer kann ich rechnen, wenn ich mein Dachfenster regelmäßig und gut pflege?
Ein Dachfenster kann locker eine Nutzungsdauer von 30-40 Jahren erreichen. Danach werden dann schon Verschleißteile spröde, das Glaspaket undicht und auch vom aktuellen Stand der Technik hinken die Fenster hinterher, so dass es sich empfiehlt, ein neues Dachfenster einzubauen.
Welches Fenstermaterial ist aufwändiger in der Pflege?
Hier muss man eindeutig Holz nennen. Auch bei Kunststoff gibt es einiges zu beachten, aber Holz ist organisches Material, und daher natürlich durch Mikro-Organismen und Schimmelpilze, die das Substrat als Nahrung verwenden, stärker bedroht als robuster Kunststoff. Weiteres s.u.
Sind Holz- oder Kunststoff Dachfenster besser?
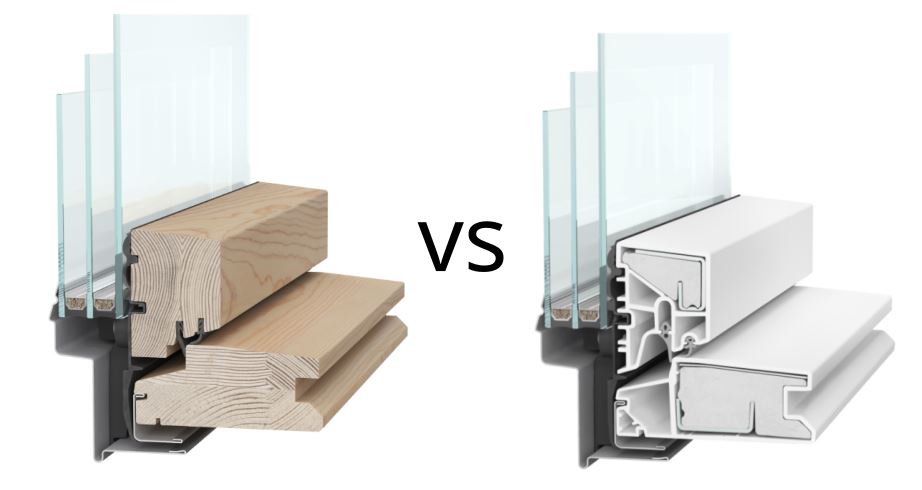
Rein vom Stand der Technik gibt es keine Unterschiede zwischen Holz- oder Kunststoffdachfenstern mehr. Kunststoff hat in den letzten Jahren technisch sehr stark aufgeholt, so dass hinsichtlich Dämmwerten und Dichtigkeiten der Dachfenster keine Unterschiede bestehen und auch vom Material her ist der Kunststoff heute nicht mehr mit dem von vor 20 oder 30 Jahren vergleichbar. Holz ist derzeit Kunststoff preislich noch etwas überlegen (erfordert dafür mehr Sorgfalt in Nutzung und Pflege) und bei einigen Herstellern sind extrem große Dachfenster nur als Holzvariante erhältlich.
Die richtige Handhabung und Pflege von Dachfenstern kann man in verschiedene Kategorien unterteilen, die dann abschließend etwas näher beleuchtet werden sollen:
• Vermeidung stehender Feuchtigkeit am Dachfenstern
• Reinigung
• Wartung
• Pflege
Weiß liegt ewig im Trend!
Weiß liegt im Trend!
Monochrome Innenräume, in denen Weiß vorherrscht, waren in den letzten Jahren ein Dauerbrenner. Vor allem, weil sie mit dem richtigen Zubehör zu jeder Art von Raum passen und gleichzeitig ermöglichen eine einzigartige Deko-Projekt zu schaffen. Wenn wir draußen jeden Tag eine Vielfalt an bunten Plakaten und Reklametafeln sehen, träumen wir von einer schlichten, monochromen Einrichtung für unser Zuhause oder im Restaurant, in dem wir einen angenehmen Nachmittag verbringen möchten.
Weiß vermittelt ein Gefühl von Glückseligkeit, Harmonie und Entspannung, da sie vor allem mit Frische, Güte und Reinheit assoziiert wird. Die Farbe wird auch mit dem Licht identifiziert, wobei je nach Art der Beleuchtung derer Intensität und dem Anteil der Lichtstrahlen unterschiedliche Schattierungen auftreten.
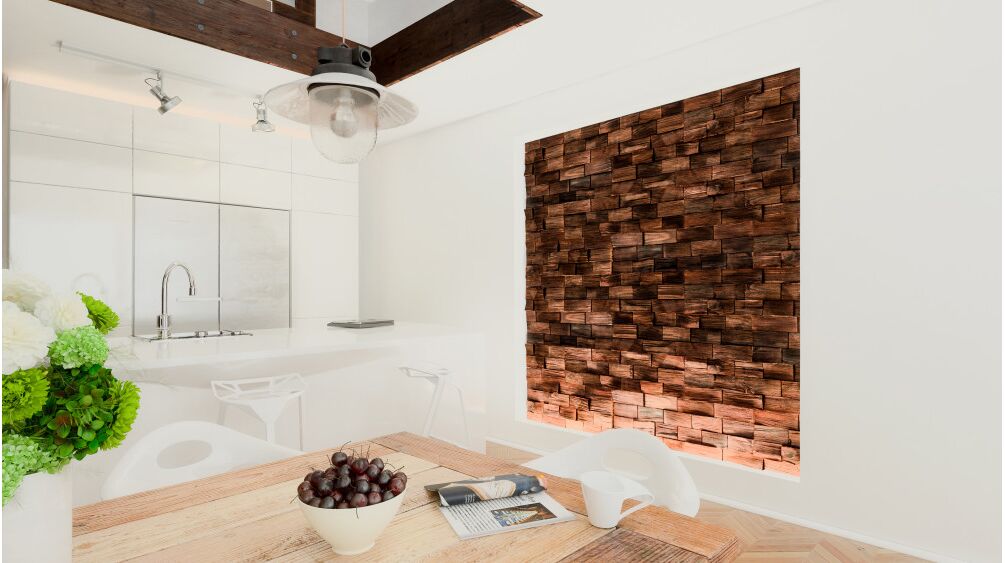
Die weiße Farbe bietet vor allem viel Spielraum für die Raumgestaltung. Einerseits wird die heutzutage mit Schwarz oder verschiedenen Grautönen kombiniert. Andererseits passt sie perfekt zu Holz und allen anderen Naturtönen. Je nach dem Geschmack und verwendeten dekorativen Accessoires kann man mit der weißen Farbe als Basis sowohl ein schickes Glamour-Interieur als auch moderne Räume mit rohem Loft-Look oder ganz umgekehrt - klassisch elegante Innenräume schaffen. Unsere Phantasie ist hier die einzige Grenze!
Trendige Wände aus weißem Ziegelstein
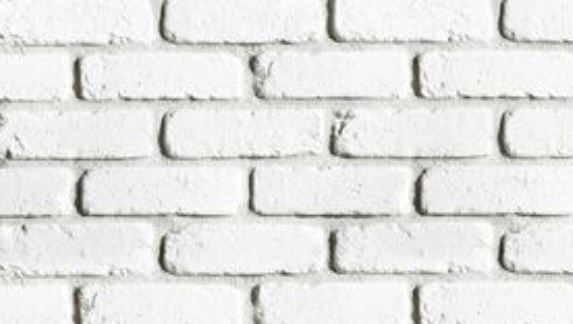
Eine weiße Wand muss aber nicht zwangsläufig langweilig oder eintönig sein. Greifen Sie einfach zu weißen Deko-Verblendern anstelle von weißer Farbe. Die Ziegelstruktur verleiht dem gesamten Innenraum einen einzigartigen Charakter, ohne zu sehr hervorzustechen, und bildet den perfekten Hintergrund, um andere dekorative Akzente zu setzen.
Das sind die Möglichkeiten der weißen Dekorfliesen, die einer unserer Kunden in seinem neuen Restaurant verwendet hat. Die Restaurants Ahoi Wiesmar und Ahoi Grömitz, die zu der bekannten Restaurantkette Ahoi Steffen Henssler in Deutschland gehören, sind mit Stegu LOFT White Ziegelriemchen aus Gips ausgestattet. Die schwarzen geometrischen Muster verliehen der Wand ein einzigartiges Aussehen und passten perfekt zum industriellen Dekor des Restaurants am Meer.
Weitere inspirierende Fotos über die Verwendung von dekorativen Verblendern oder Paneelen im Innen- und Außenbereich finden Sie in der Sektion "Dekoration" auf der Website unseres Shops.
Optimale Lüftung des Wohnraums - Dachfenster mit Lüfter

Ohne frische Luft ist es praktisch unmöglich, das richtige Wohnklima zu schaffen. Und dieses steigert das Wohlbefinden und die geistige Leistungsfähigkeit. Diese wiederum verhilft auch zu einer besseren Konzentration oder einem besseren Schlaf, je nachdem, wie der Raum genutzt wird. Dies ist eigentlich auch allgemein bekannt. Untersuchungen zeigen jedoch, dass nur ein Viertel der Bevölkerung die Räume, die wir bewohnen oder in den wir arbeiten, regelmäßig lüftet. Während wir im Frühling und Sommer eher dazu neigen, die Fenster zu öffnen, halten wir dies im Winter und Herbst auf ein Minimum beschränkt - entweder wegen Niederschlägen oder auch aus Angst vor Wärmeverlust in den Räumen. Es gibt aber noch andere Möglichkeiten als weit geöffnete Fenster, um für frische Luft in einem Raum zu sorgen.
Raumklima - früher und heute
In der Vergangenheit strömte aufgrund der schlechteren Isolierung der Gebäude und der Qualität ihrer Oberflächen ständig Luft durch Spalten in den Fußböden oder durch dünne Fenster mit Einfachverglasung ins Innere. Heutzutage wird, sowohl aus ökologischen als auch aus wirtschaftlichen Gründen, einer guten Isolierung von Wohngebäuden große Bedeutung beigemessen. Dabei ist jedoch zu beachten, dass je besser Gebäude, Dachfenster und Dach isoliert sind, der Luftaustausch zwischen innen und Außen um so schwieriger wird. Die Luft in einem ungelüfteten Raum wird nach einiger Zeit schwer, unangenehm und mit mehr Kohlendioxid gesättigt. Dazu kommen weitere Probleme. Die heutzutage hergestellten Fenster haben meistens hohe Wärmedämmungsparameter - das ist ihr unbestrittener Vorteil, denn sie schützen perfekt vor Kälte und Wind. Aber man darf dabei nicht vergessen, dass ein geschlossenes Fenster auch die Feuchtigkeit in den Räumen hält. In unseren Wohnungen entsteht täglich eine große Menge an Wasserdampf bei Haushaltsarbeiten wie Kochen, Bügeln oder Wäschetrocknen oder beim Baden. In Büros oder Schulen ist der Fall ähnlich - auf engem Raum versammeln sich größere Gruppen von Menschen und - jeder Mensch gibt im Laufe des Tages etwa 0,5 Liter Wasser über die Haut und mehr als einen Liter über die Atmung ab. Eine größere Gruppe stellt also eine wesentliche "Feuchtigkeitsquelle" dar. Ein sichtbares Zeichen für dieses Problem ist Bildung von Kondenswasser. Das unsichtbare hingegen ist die Ansammlung von Viren, Bakterien und Mikroorganismen, die durch Feuchtigkeit und Wärme begünstigt werden. Ein ungelüfteter, feuchter Raum ist auch ein Paradies für Schimmel, der sowohl die Wände als auch die Bausubstanz schädigt. All dies kann sich negativ auf unsere Gesundheit auswirken und sogar Allergien oder andere Krankheiten verursachen.
Vorteile einer ständigen Frischluftzufuhr:
- ein gesundes Raumklima
- verbessert die Konzentration sowie Arbeits-/Lernleistung
- erleichtert das Einschlafen und verbessert die Qualität des Schlafs
- verringert Schadstoffbelastung - Kohlendioxidkonzentration
- beugt vor/verringert Bildung von Kondenswasser
- reduziert das Risiko von Schimmel an Wänden und Fenstern
- erleichtert die Aufrechterhaltung der Hygiene im Raum
- verringert die Ausbreitung von Bakterien und Viren
- fördert das Immunsystem, reduziert Risiko von Allergien
Frische Luft zu jeder Jahreszeit und bei jedem Wetter, zu jeder Tages- und Nachtzeit
Es ist wirklich möglich. Die effektivste Art, eine ständige Luftzirkulation zu erreichen, ist ein Rekuperationssystem. Dies ist jedoch eine komplexe und kostspielige Lösung. Eine viel einfachere Lösung ist die Montage von Fenstern, einschließlich Dachfenstern, mit integrierter Dauerlüftung. Dank der strömt frische Luft in den Raum, auch wenn das Fenster geschlossen ist, also auch wenn es regnet oder sehr kalt ist. Durch die Wahl von Dachfenstern mit Lüftungsblende, kann der Dachboden auch bei Abwesenheit oder im Schlaf belüftet werden. Die Lüfter werden in den Fensterrahmen eingesetzt oder in der Griffleiste integriert eingebaut und können bei Bedarf natürlich auch geschlossen werden.
Arten von Lüftern in Dachfenstern:
Automatische Lüftungsblende, die mit einem speziellen Sensor ausgestattet sind, der den Ventilator automatisch aktiviert, wenn sich die Luftfeuchtigkeit, Temperatur oder der Luftdruck im Raum ändern (je nachdem um welchen Sensor es geht). Der Sensor aktiviert sich und reguliert automatisch die Einstellung der Öffnung der Lüftungsblende.
Manuell einstellbare Lüftungsblende, bei denen der Schwerpunkt auf der Effizienz liegt. Diese muss man manuell öffnen. Wird die Dauerlüftung nicht benötigt, weil man bspw. über mehrfaches tägliches Stoßlüften bereits reichlich Luft ausgtauscht hat, wird die Blende einfach zugeschoben und die Dauerlüftung dadurch "inaktiviert". Diese Art von Lösung ist am häufigsten bei verschiedenen Dachfensterherstellern zu finden.
Zusammenfassend lässt sich sagen, dass den meisten von uns die Vorteile einer angemessenen Belüftung und Frischluftzufuhr bekannt sind. Untersuchungen zufolge lüftet jedoch nur ein Viertel von uns die Räume regelmäßig. Deshalb sollte man beim Kauf von Dachfenstern die Anschaffung von Modellen überlegen, die mit einer Lüftungsblende ausgestattet sind, die den Dachboden ständig mit Frischluft versorgt und so den Wohnkomfort erheblich verbessert.
In unserem Shop finden Sie Dachfenster mit Lüfter von verschiedenen Hersteller, wie zum Beispiel: Optilight, Fakro, Velux. Sollten Sie weitere Fragen haben, zögern Sie bitte nicht, unseren Kundendienst zu kontaktieren.


