TV wall: Read here how you can transform your TV wall to an absolute unique installation.


We are very pleased to present with step-by-step instructions how to easily construct the super TV wall. We would like to thank our customer very much, who, because he found very little information on the Internet, he decided to create the visual documentation of his construction project, and also gave a lot of information on the procedure and explained what was done and why. The result is a wall made of bricks that is more than just impressive. Please read our customer's documentation now and get inspired for your own projects. You also have the option of leaving a comment below the text or share your construction's realization. We are very curious how do your projects look like.
Idea, plan, tiles choice
I planned to hang my TV on the wall for a long time. What kept me from doing it? I didn't want to see any supply cables. Or a cable duct - like the many people mount, was out of the question for me.
So I quickly got an idea to build a "wall in front of the wall". But how should it be made? Shall I paint it? Put a wallpaper? But I really didn't want that. I liked stones - I thought.
So after a long search I found this company, which among other things offers a wide range of different bricks, stones and brick slips.
Of course, I had a lot of questions that were answered in a very friendly and competent manner.
So when I ordered the stuff, I still had a bad feeling about this. If the transport works, the goods arrive safely, etc. But what if not? Finally everything arrived in top condition, secured properly. After searching the Internet a lot at the beginning of the project and not finding too much, I decided to document the whole thing a little
My wall was made of YTONG blocks
Stone I chose: Cairo moonlight.
Montage
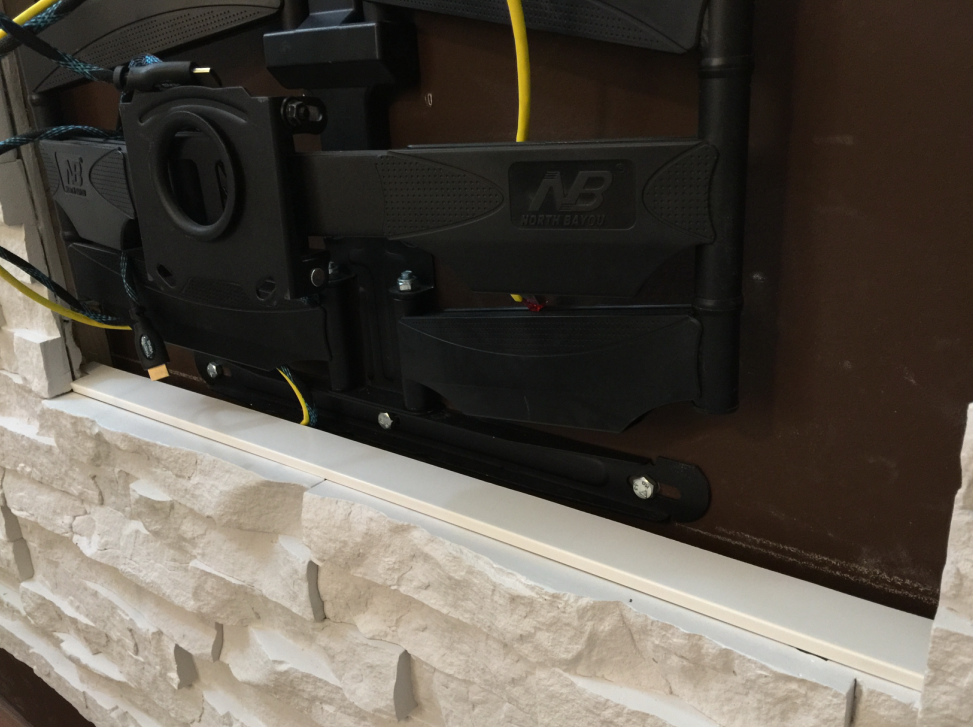
I mounted 18 mm OSB boards with tongue and groove onto profiles screwed to the YTONG wall. As a TV holder I took an extendable holder, because thanks to it, it would be possibile to adjust the depth later once the stones are glued. Thanks to that TV sits flat and very close to the wall. I screwed the holder with special YTONG anchors from Fischer. It will hold a 65 'TV later.
The nice thing about the holder: If you have to work on the cables later, you can pull everything off very nicely without removing the TV.
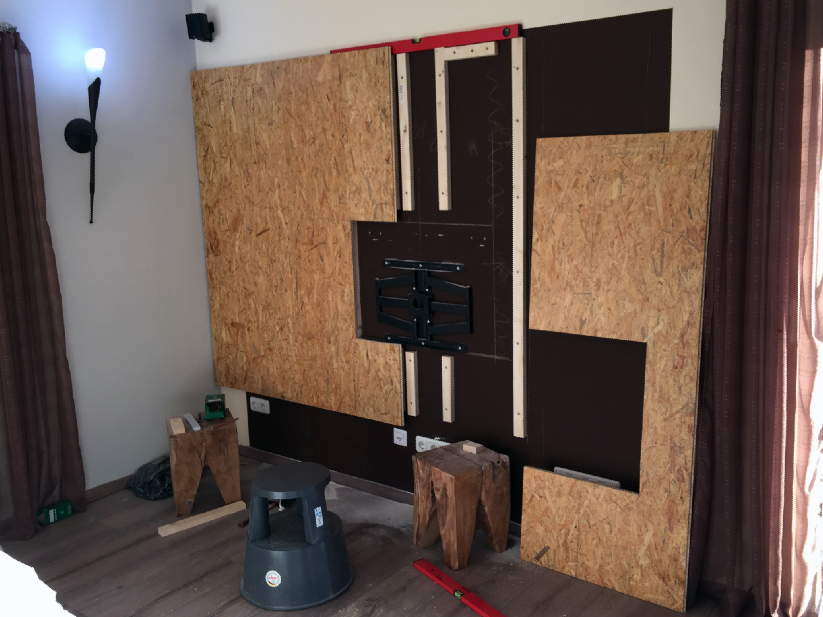
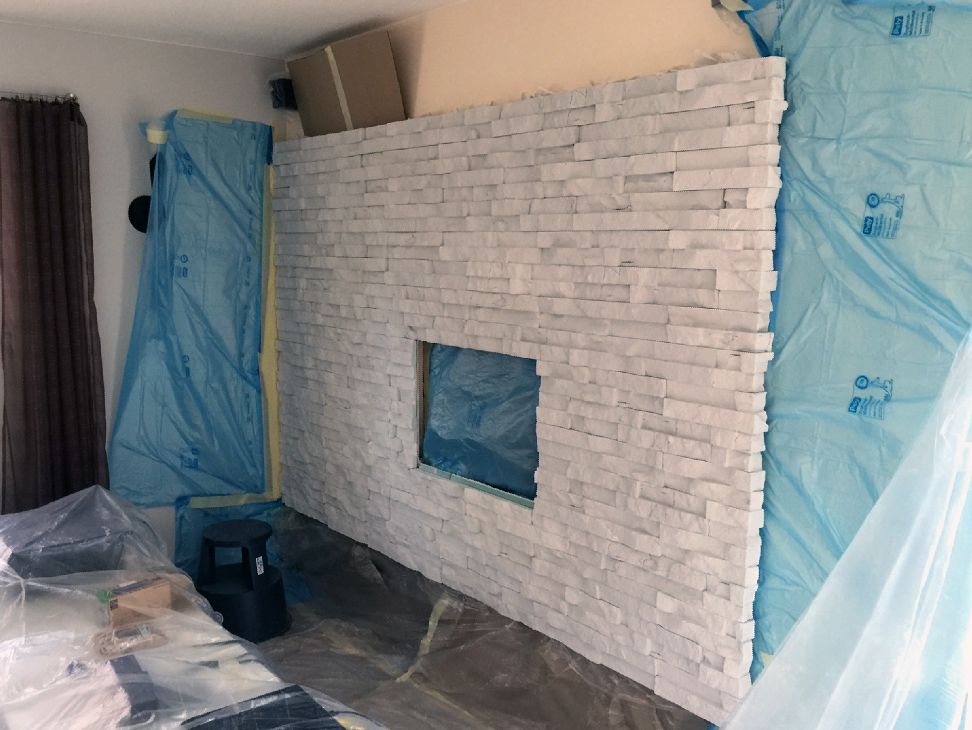
When the boards were screwed together, I primed the surface 3 times with a deep primer. The plates are mounted on at the top and on the right little higher than profiles so that they outstand slightly. Thanks to that I installed Philips Hue Stripes + LEDs.
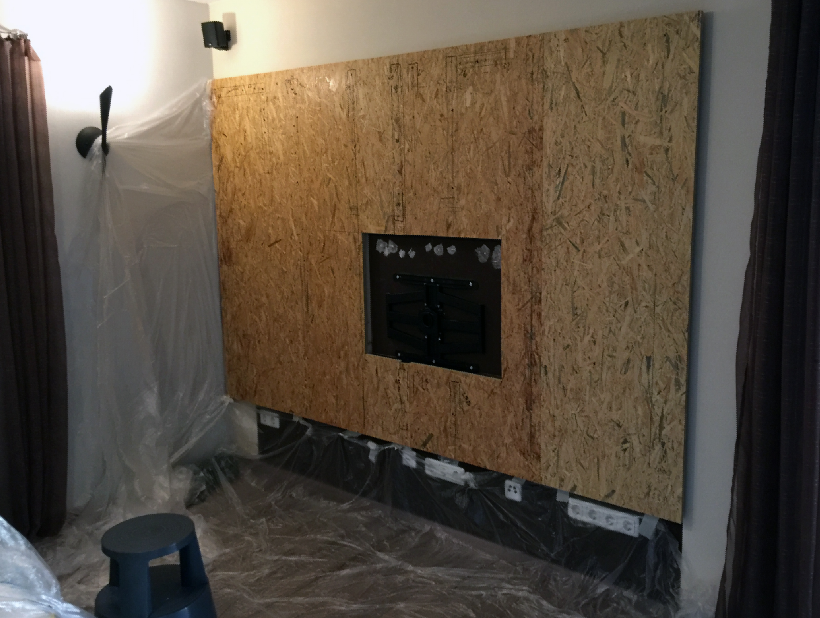
I mounted GKB boards on OSB boards.
Why? That's very simple, on OSB baords gypsum tiles won't hold so easily as on plasterboards boards.
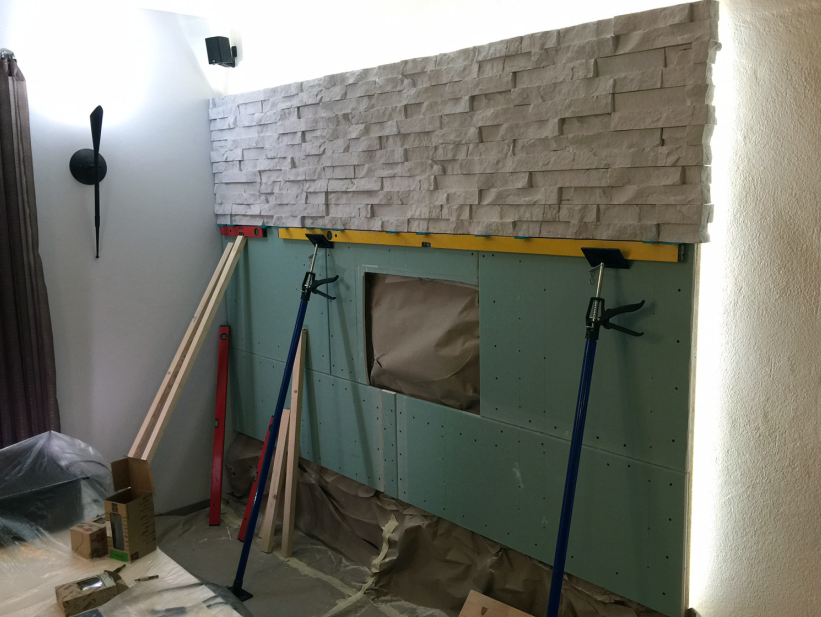
For sure you are wondering why I got started from the top.
Also very simple: The shape of those tiles is not regular and I was afraid, that when I will start from the bottom, top layer would be not perfect (because most probably I would have to cut the tiles in half to adjust them to the boards).
That's why I started from the top.
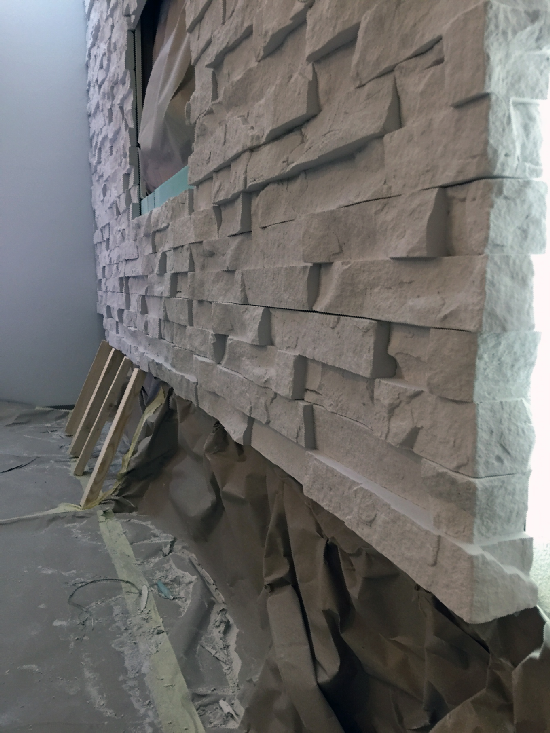
To prevent tiles from sliding down, I worked with supports. It turned out that it wasn't necessary because the glue dried very quickly. Well, better safe than sorry. ;-)

Starting from the top also had an advantage while gluing. If a little glue spilled nothing stays on the stones.
I cut the stones with a standard foxtail hand saw.
The cuts have to be right-angled.
I had to cut the corners edges. They had to be cut exactly in such a way that the edge of the OSB board and plasterboard was covered.
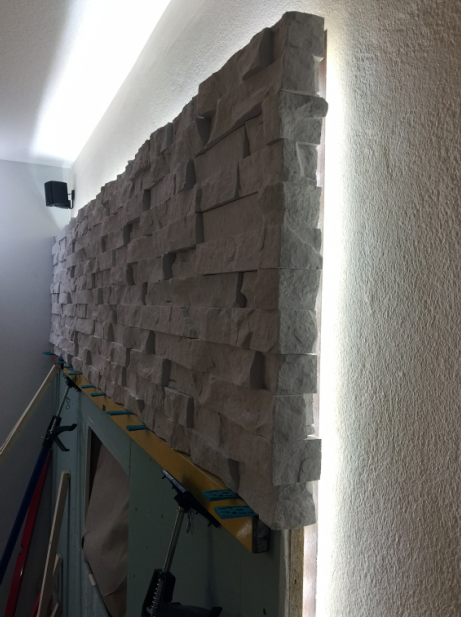
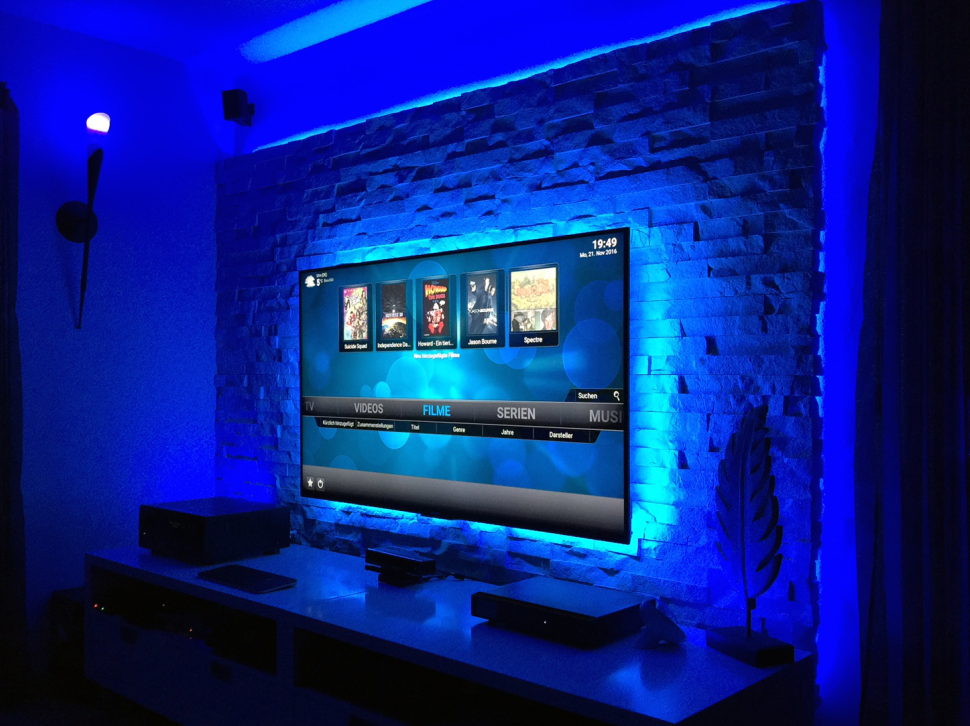
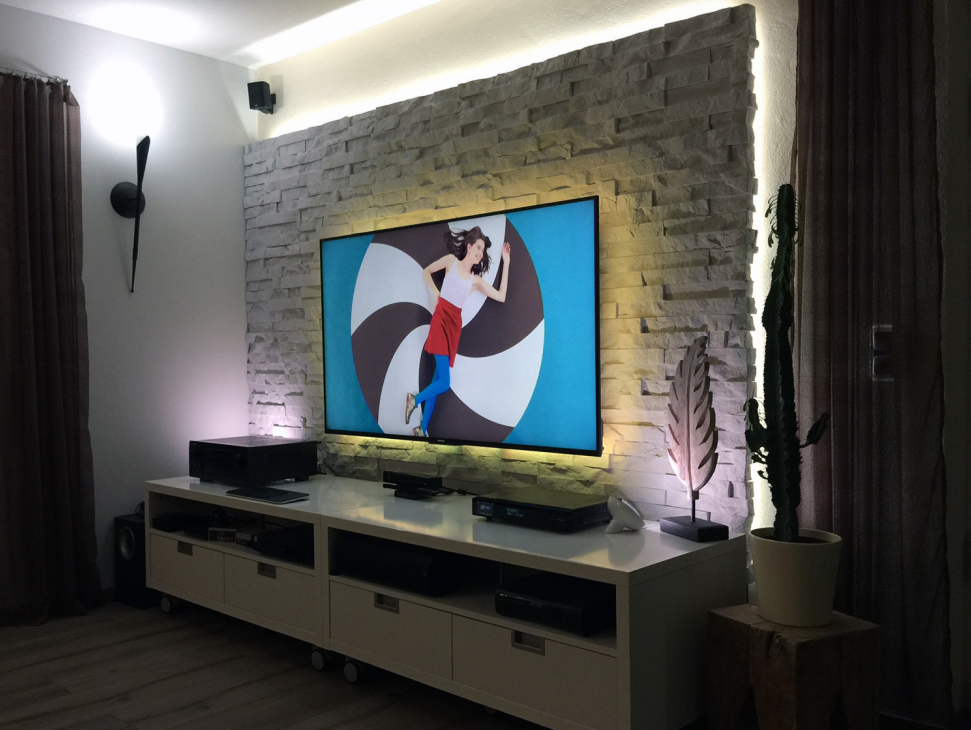
I didn't mount them right up to the wall, but left a gap. That was intentionally. Now light from the LED tape comes through.
I mounted LED tape in a way that allows me replacing it in the future.
At the bottom I supported the last row with leftover pieces of wood.
Then I primed the tiles to secure them from getting dusty later.
You must be careful there - secure the walls around, so that primer won't make a stains everywhere.
In bottom edge of the holder, I put a cable duct cover to mask the edges where you can see OSB and plasterboard.
You can't see it later after TV montage, but I prefer that way ;-)
Then it was time to lay the cables.
After taking this picture I put more sockets under the wall and repainted the lower edge.
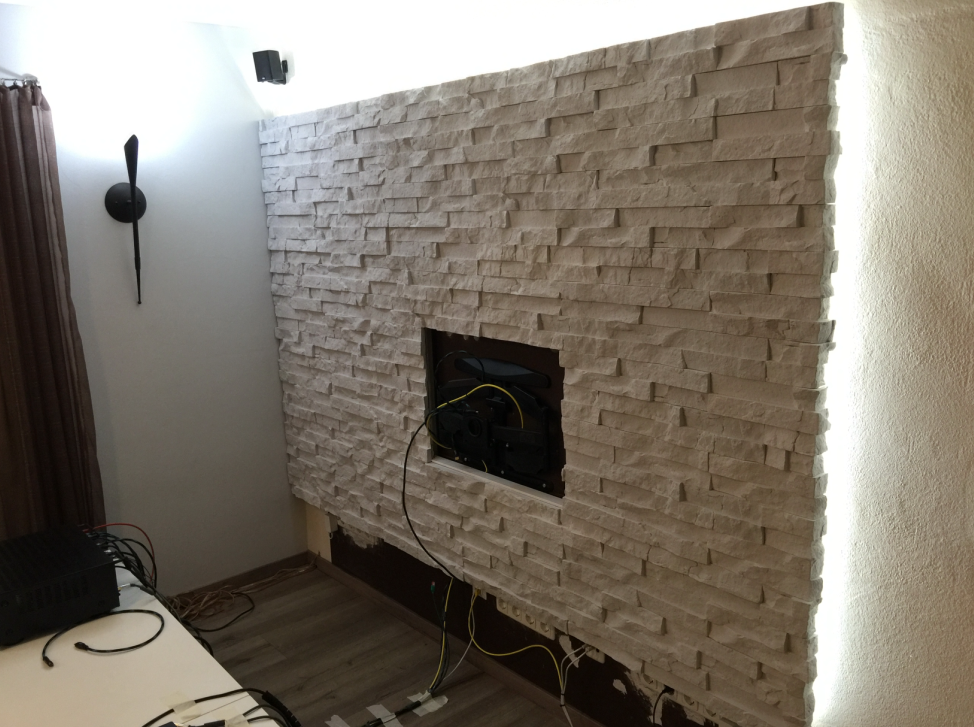
Then I installed the 65'' TV and attached a DIY Ambilight to it, which is controlled via Raspberry.
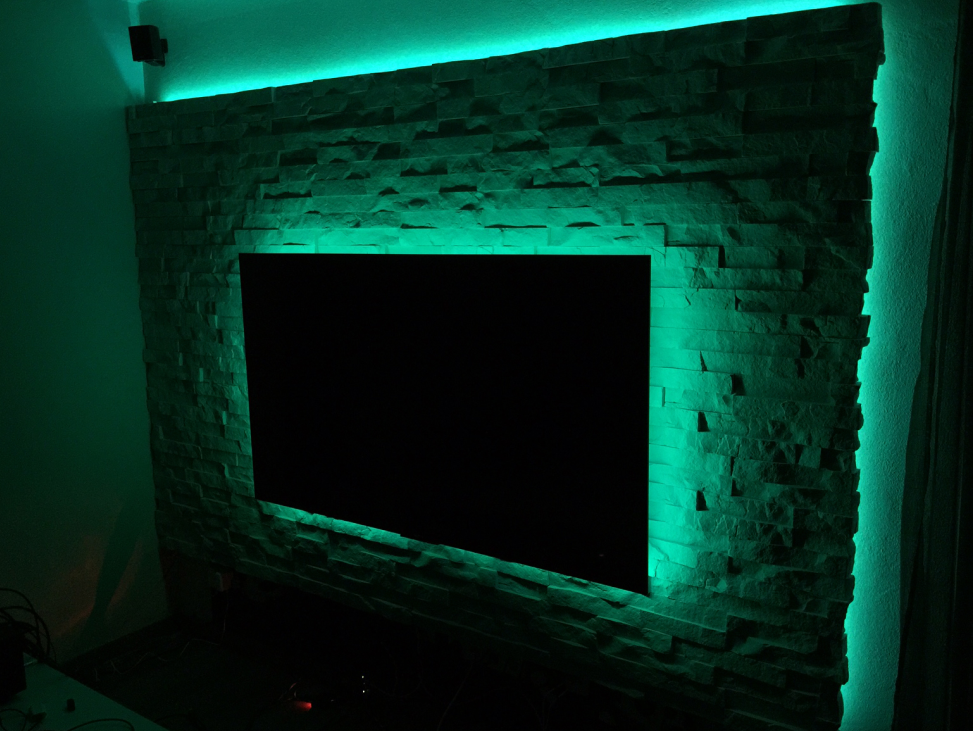
Then I put a furnitures back. Tiles on the wall look perfect in indirect light.
To sum up:
Work with those tiles is very easy. However, there is also a lot of dust. Therefore, as written above, I sawed tiles by hand, which is really quick. I glued the stone almost perfect. A few spots, where joints are not even could not be avoided totally. But it is not noticeable.
The final result on the Foto doesn't look as good as it really is. It looks just great!
If you have any further questions, please do not hesitate to contact me directly. I will answer you as soon as possible.
Greetings from the North
F.Mollenhauer ([email protected])
Comments
Read our guide now


PayPal about baubaY.de
You have happy customers, a good track record with PayPal and we have the info we need to keep your account secure.
In other words, you’ve got an excellent history with PayPal. Keep up the amazing work.


![]()
![]()
![]()